
Jumping In
I’ve wanted to do an RGH on an Xbox 360 for a long while. For those who haven’t heard of this mod before, the Reset Glitch Hack is a modification that can be done in an Xbox 360 in order to enable it to run unsigned code. I’ve actually tried this one previously too! Unfortunately, it went even worse than my picoboot attempt. I was broke as hell when I attempted it too and it was actually a project I was trying to get some quick cash by selling it on eBay. I ended up frying the thing as my soldering skills at the time were woefully inadequate. Womp womp. This was part of the reason I haven’t tried again in some time. Ultimately, I had a very bad experience doing that install, lost money, and it turned out like this fedi post1 (I felt very called out):
I had been checking Facebook Marketplace frequently to find a candidate for this mod, but I actually ended up picking this one up from a pawn shop in town for like $30. It was downright disgusting, covered in gross substances, but the overall condition was still fair. This wasn’t a huge problem as I’d be disassembling the console anyways, so it’d get a chance to get a bath.
Anatomy of the Selected Model
I selected this specific unit because it was a slim model. As one should know, early models of the Xbox 360 were notorious for the “Red Ring of Death”, which references a general failure code that is shown by lighting up three of the four controller indicator lights around the Xbox 360 power button. Later revisions of the Xbox 360 fixed this issue. An easy way to pick out one of these revisions is just to pick out a slim model. These can be distinguished by the lack of memory card slots on the front and the lack of a hard drive mounted on the exterior of the unit2. You’ll want to avoid the E-series ones. These ones are more boxy in form compared to the slims, sometimes compared to the form factor of the initial Xbox One “VCR” models. They usually have Winchester boards, which no mod has been found for yet.

With the slim models, you usually get one of two board types: Trinity or Corona. There’s a few subtle differrences between the two of these that can affect how your mod is installed. There’s handy guides online to distinguish what type you’ve got by the power plug shape and what voltage and current the console uses. Mine was identified as a Corona with this guide. Corona Xboxes can ship in one of two configurations: one with 4 gigabytes of onboard NAND, or one with only 16 megabytes of onboard flash. Even though the store indicated that this model had 4gb of internal storage, mine was the latter of the two configurations. Additionally, it lacked a hard drive. To get around this, it appears the former owner used a 16gb flash drive to store their profiles, games, and saves, as there was a mangy-ass Verbatim drive in the bag with the controller and power supply.
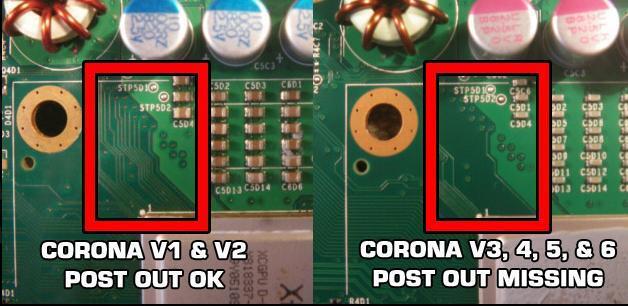
Now there’s like 6 different versions of the Corona board. I’m not exactly sure what version I have, but for now, all that we need to know is that my revision is v3 or higher3. This can be identified by looking at what traces leave the lower-right end of the CPU. We’ll talk about why this is important shortly.
Purchasing Parts
As this is a hardmod, we aren’t going to get anywhere if we don’t pick up some parts. Let’s go through what we’ll need.
| Part | Reason for ordering |
|---|---|
| 30awg Wire (Blue) | Last time, I ended up having a really bad time doing the mod thanks in part to using the wrong wire for the task. This wire will be much better suited to what is needed for this mod. |
| Kapton Tape | I also didn’t have this last time and really should have. This will keep wires snug inside the console and prevent strain on solder points if wires are moved around during the install. |
| Postfix Adapter | On Corona models v3 or above, the POST pin isn’t connected to the CPU. This pin is critical to the execution of the RGH exploit, so we’ll need a way to return this functionality. What the Postfix adapter does is stick a little needle underneath the CPU at a specific location in order to get access to the POST pin on the CPU itself. |
There’s also some other stuff I already had. Let’s go through that.
| Part | Why it’s needed |
|---|---|
| Raspberry Pi Pico | This is used in conjuntion with the Picoflasher firmware in order to read and write the SPI flash on the board. This way, we can boot into a custom firmware called Xell and dump some important cryptographic keys. Using this will enable us to create a modified Xbox 360 firmware that allows us to run unsigned code. |
| Solder, soldering iron, flux, etc | We’ll need these supplies to connect our components to the board. |
| 1K Ohm Resistor | Suprisingly, this is actually what does the bulk of the work in this mod. RGHv3 doesn’t actually use a modchip, it just uses a particular point on the board with some resistance added on top to perform the glitch. I had a nice selection of these lying around from a circuits class I took previously, so I was able to use one of those. |
| Thermal Paste | We’ll have to remove the heatsink to do this mod, so we’ll be redoing the thermal compound too. It’ll certainly be good for the console as it’s probably around 12 years old. |
Installing the Postfix Adapter
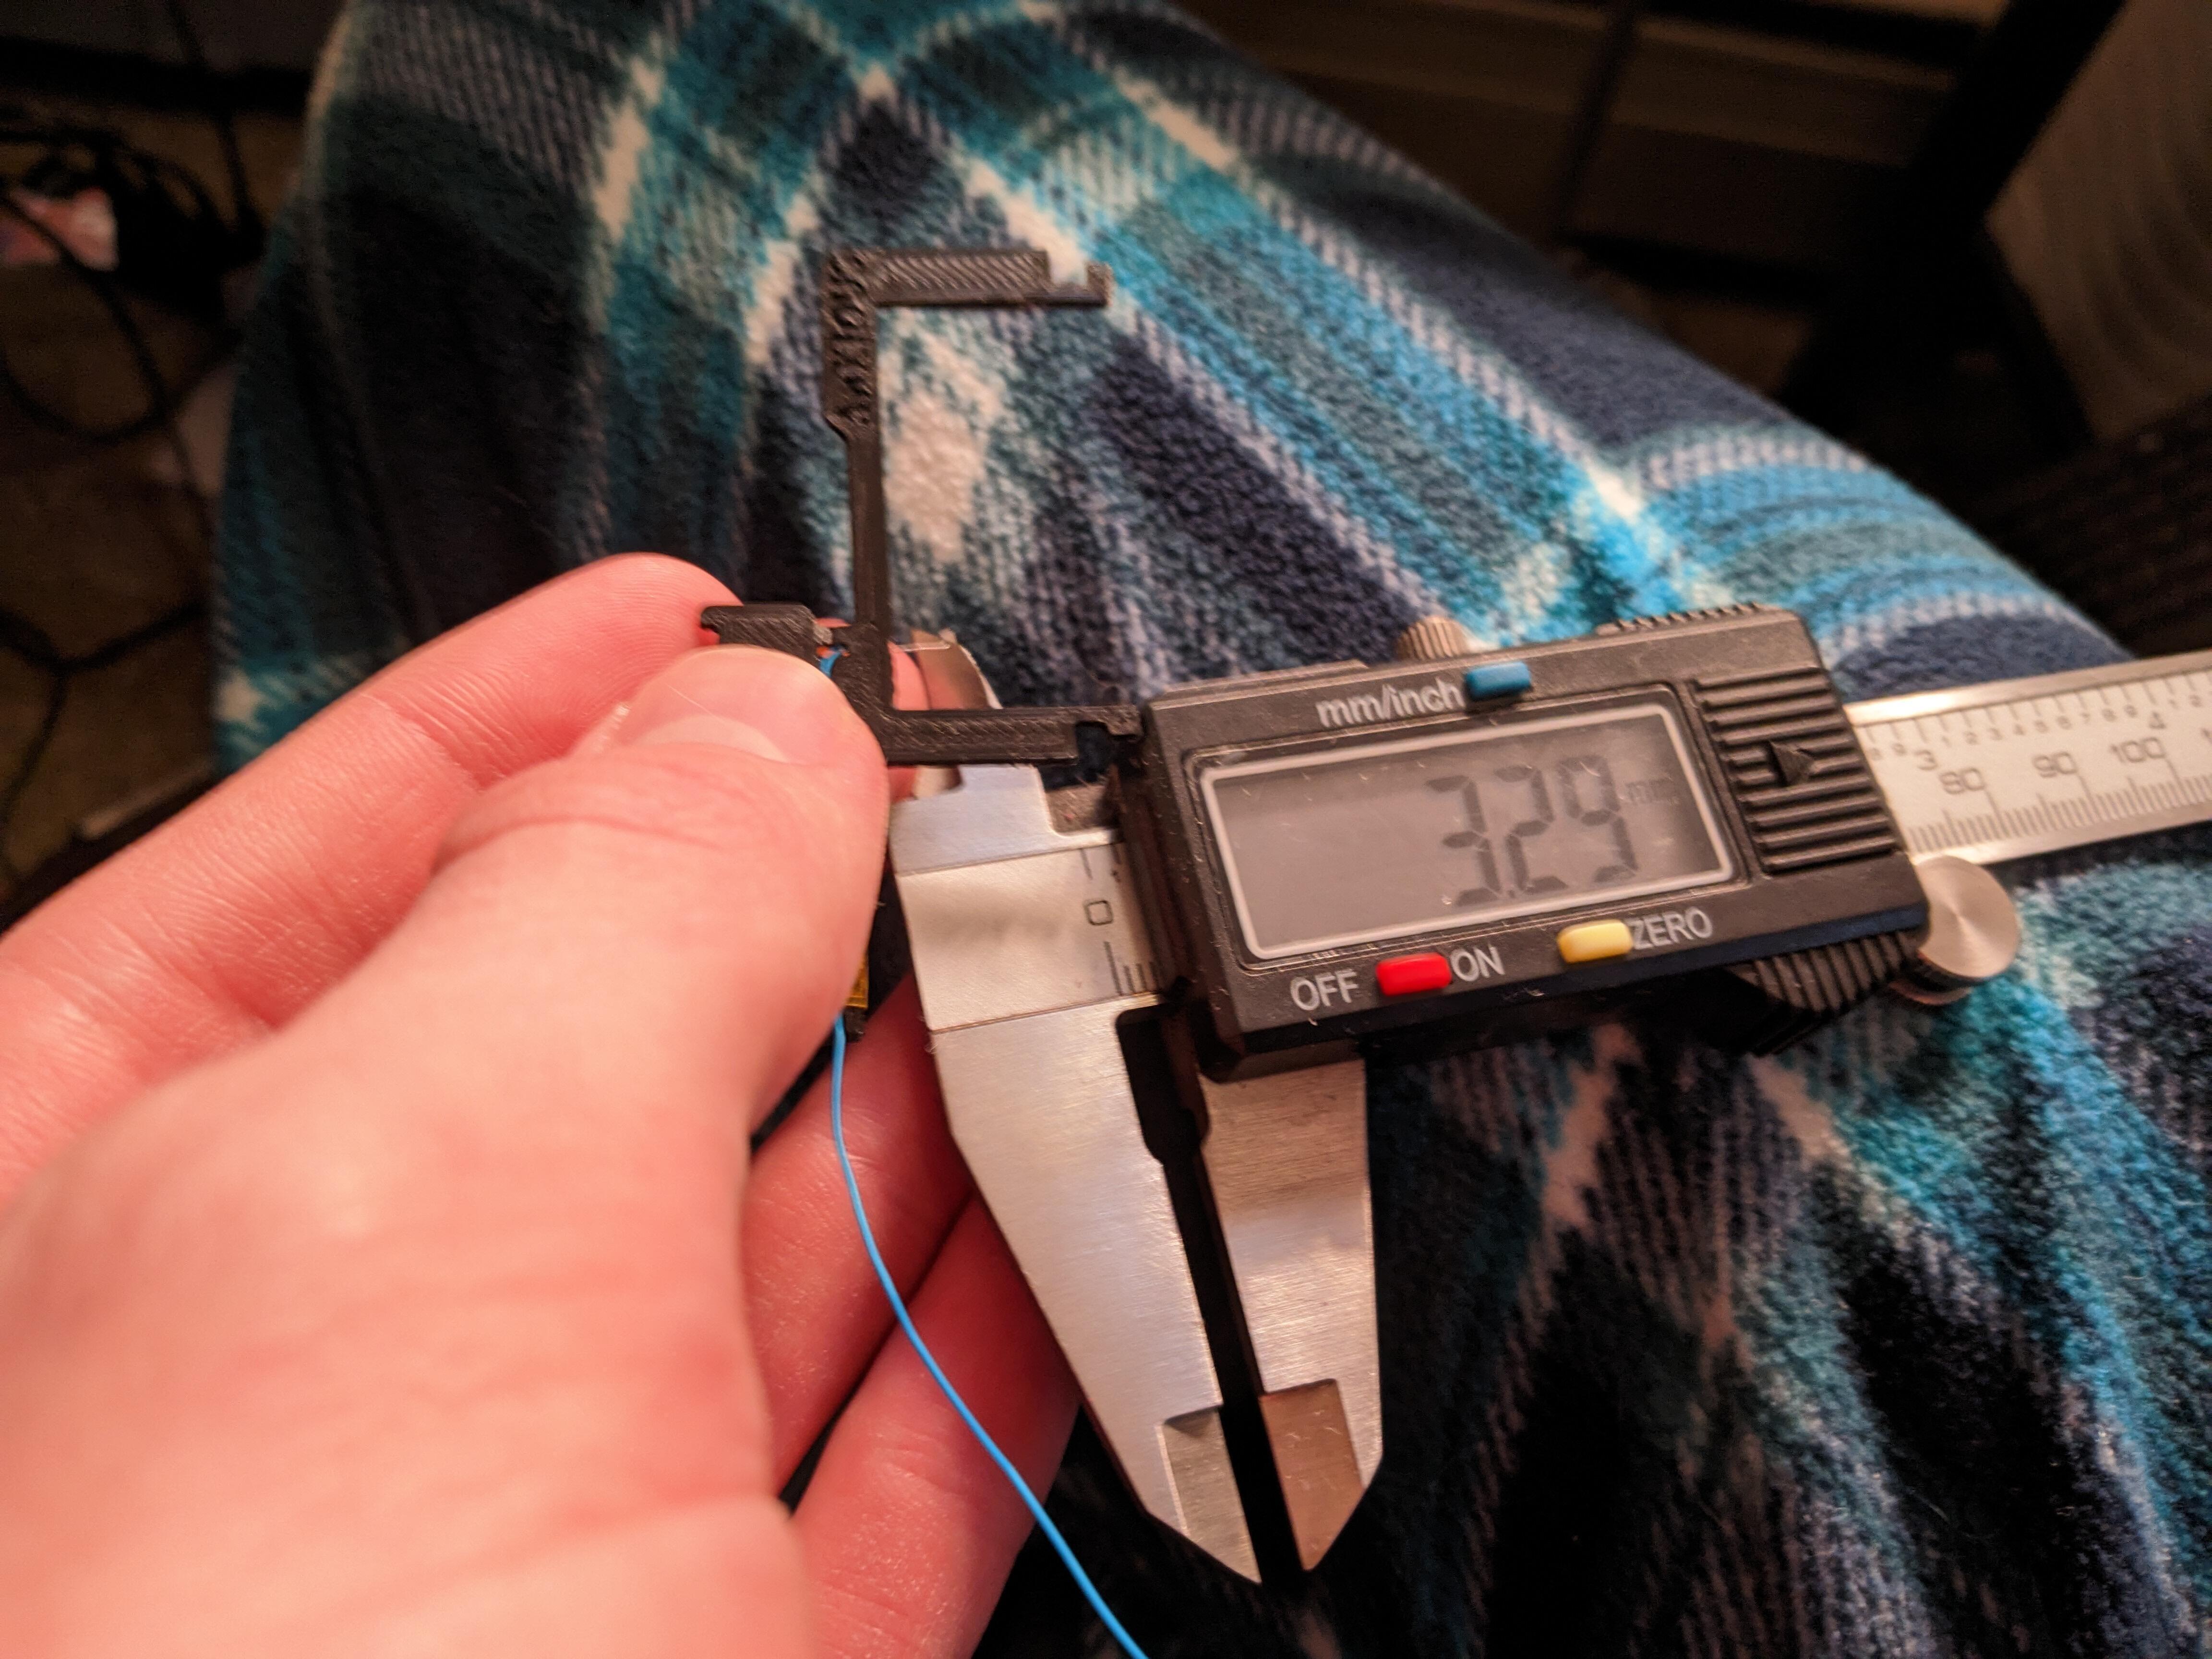
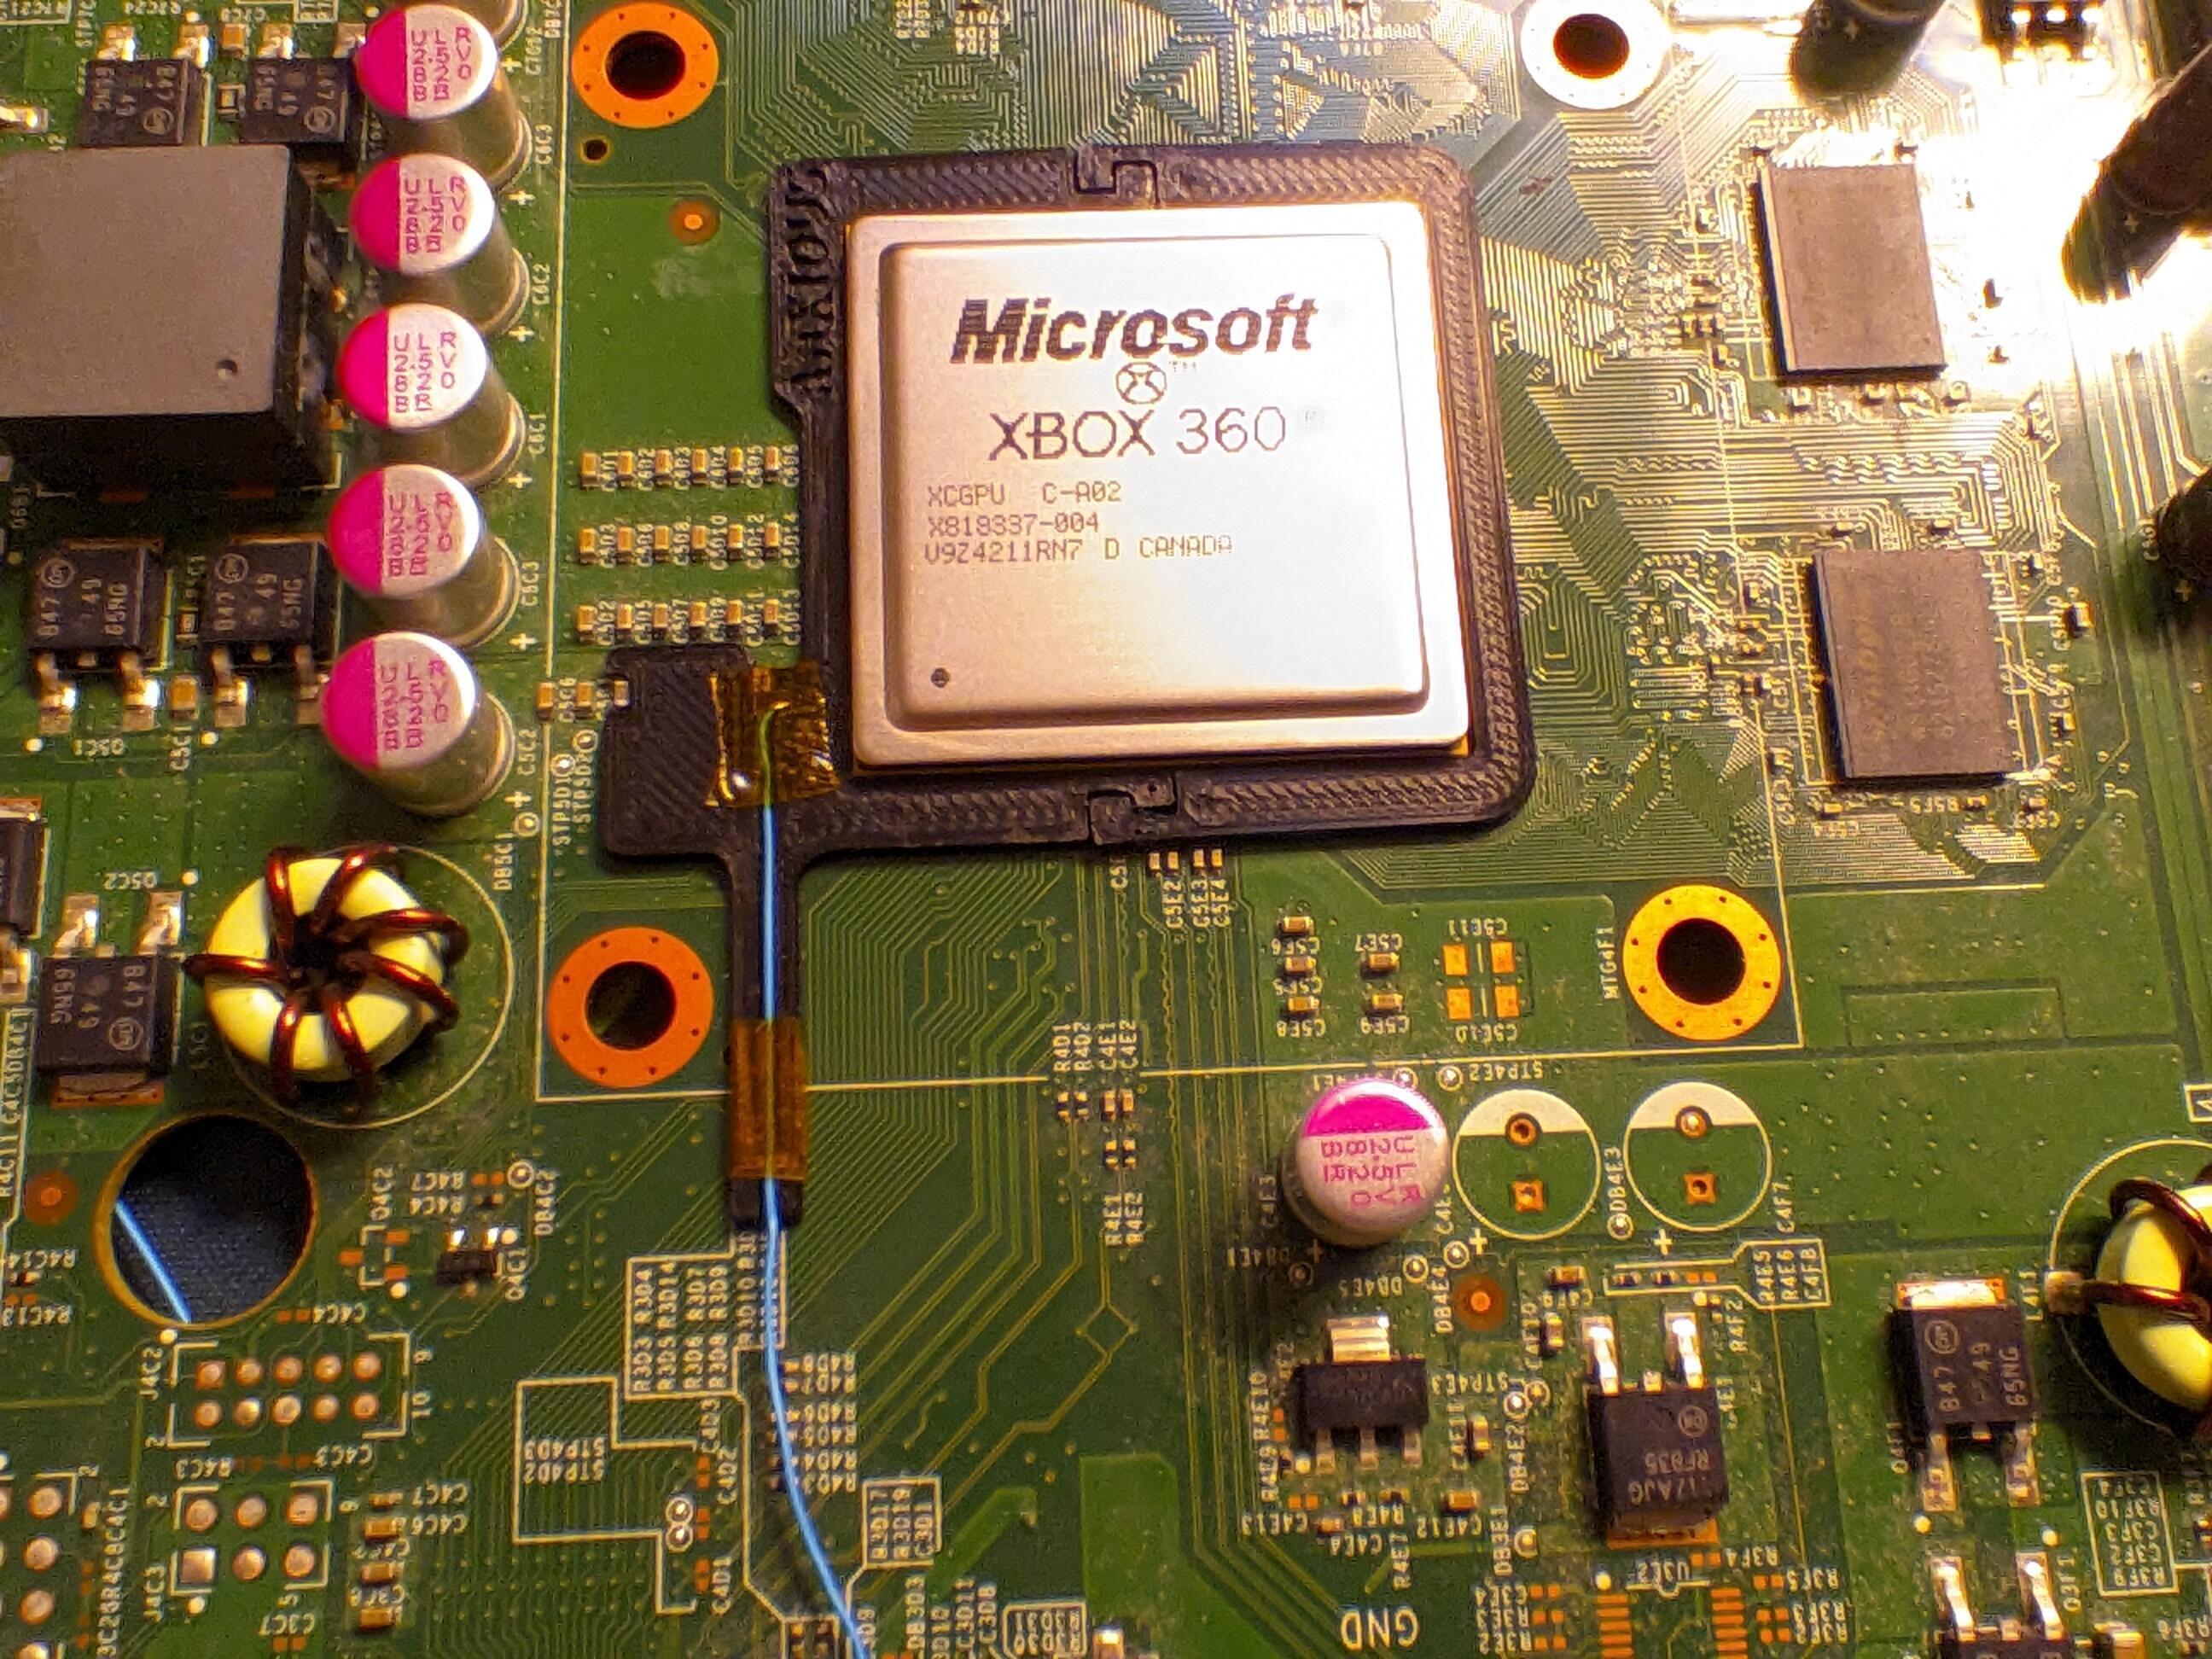
A few days passed. I had received the 30awg wire and the Kapton tape, given the board a bath using the ultrasound cleaner at work, and had washed all the plastic parts in the sink, but had not received the postfix adapter. If it wasn’t already evident from the last mod, I’m not one for waiting on supplies. Thus, I decided to go a different route. I had previously seen a post on Reddit by u/Androxilogin where they had created a postfix adapter using only their 3D printer and some wire. I figured, “Hey, I’ve got those two things, why not?”. I fired up my Ender 3v2 and sent over this model. After two prints, I had gotten a decent quality part that would fit around the APU. The one problem was that I didn’t know how long the wire should be! Since the postfix adapter is lobotomizing my APU, I wanted to be as careful as possible. I measured the pictures that u/Androxilogin had posted and determined that somewhere just above 3mm should be a good wire length.
Moment of truth. I slipped the adapter around the APU and felt some resistance while pushing the left side on, something that is said to be normal for these adapters, at least according to MrMario2011 on Youtube. Additionally, I measured the resistance of the wire to ground and found a resistance in the thousands of Ohms. It didn’t feel much empirical, but the general consensus online is that you’ve hit the point if you see any resistance to ground, so I took this at face value.
Soldering to the PLL Point (and the other points)
Next up was the PLL point on the board. This one’s a little tougher to get. The gist of the process is that some of the board’s top layer must be scraped away at this point to reveal the copper pad you’re going to solder to. You’ve gotta be real careful while doing this because there’s a trace nearby that will prevent the console from booting if you break it.
After some careful scraping with my tweezers, I was able to reveal this point on the board. I tinned it up and went to solder my 1k Ohm resistor directly to the point, and surprisingly, this went without any issue! I tried wiggling it a bit and it stayed on. To prevent any damage to the board, I did my best to secure things with Kapton tape. Finally, I connected the other two points on the board.
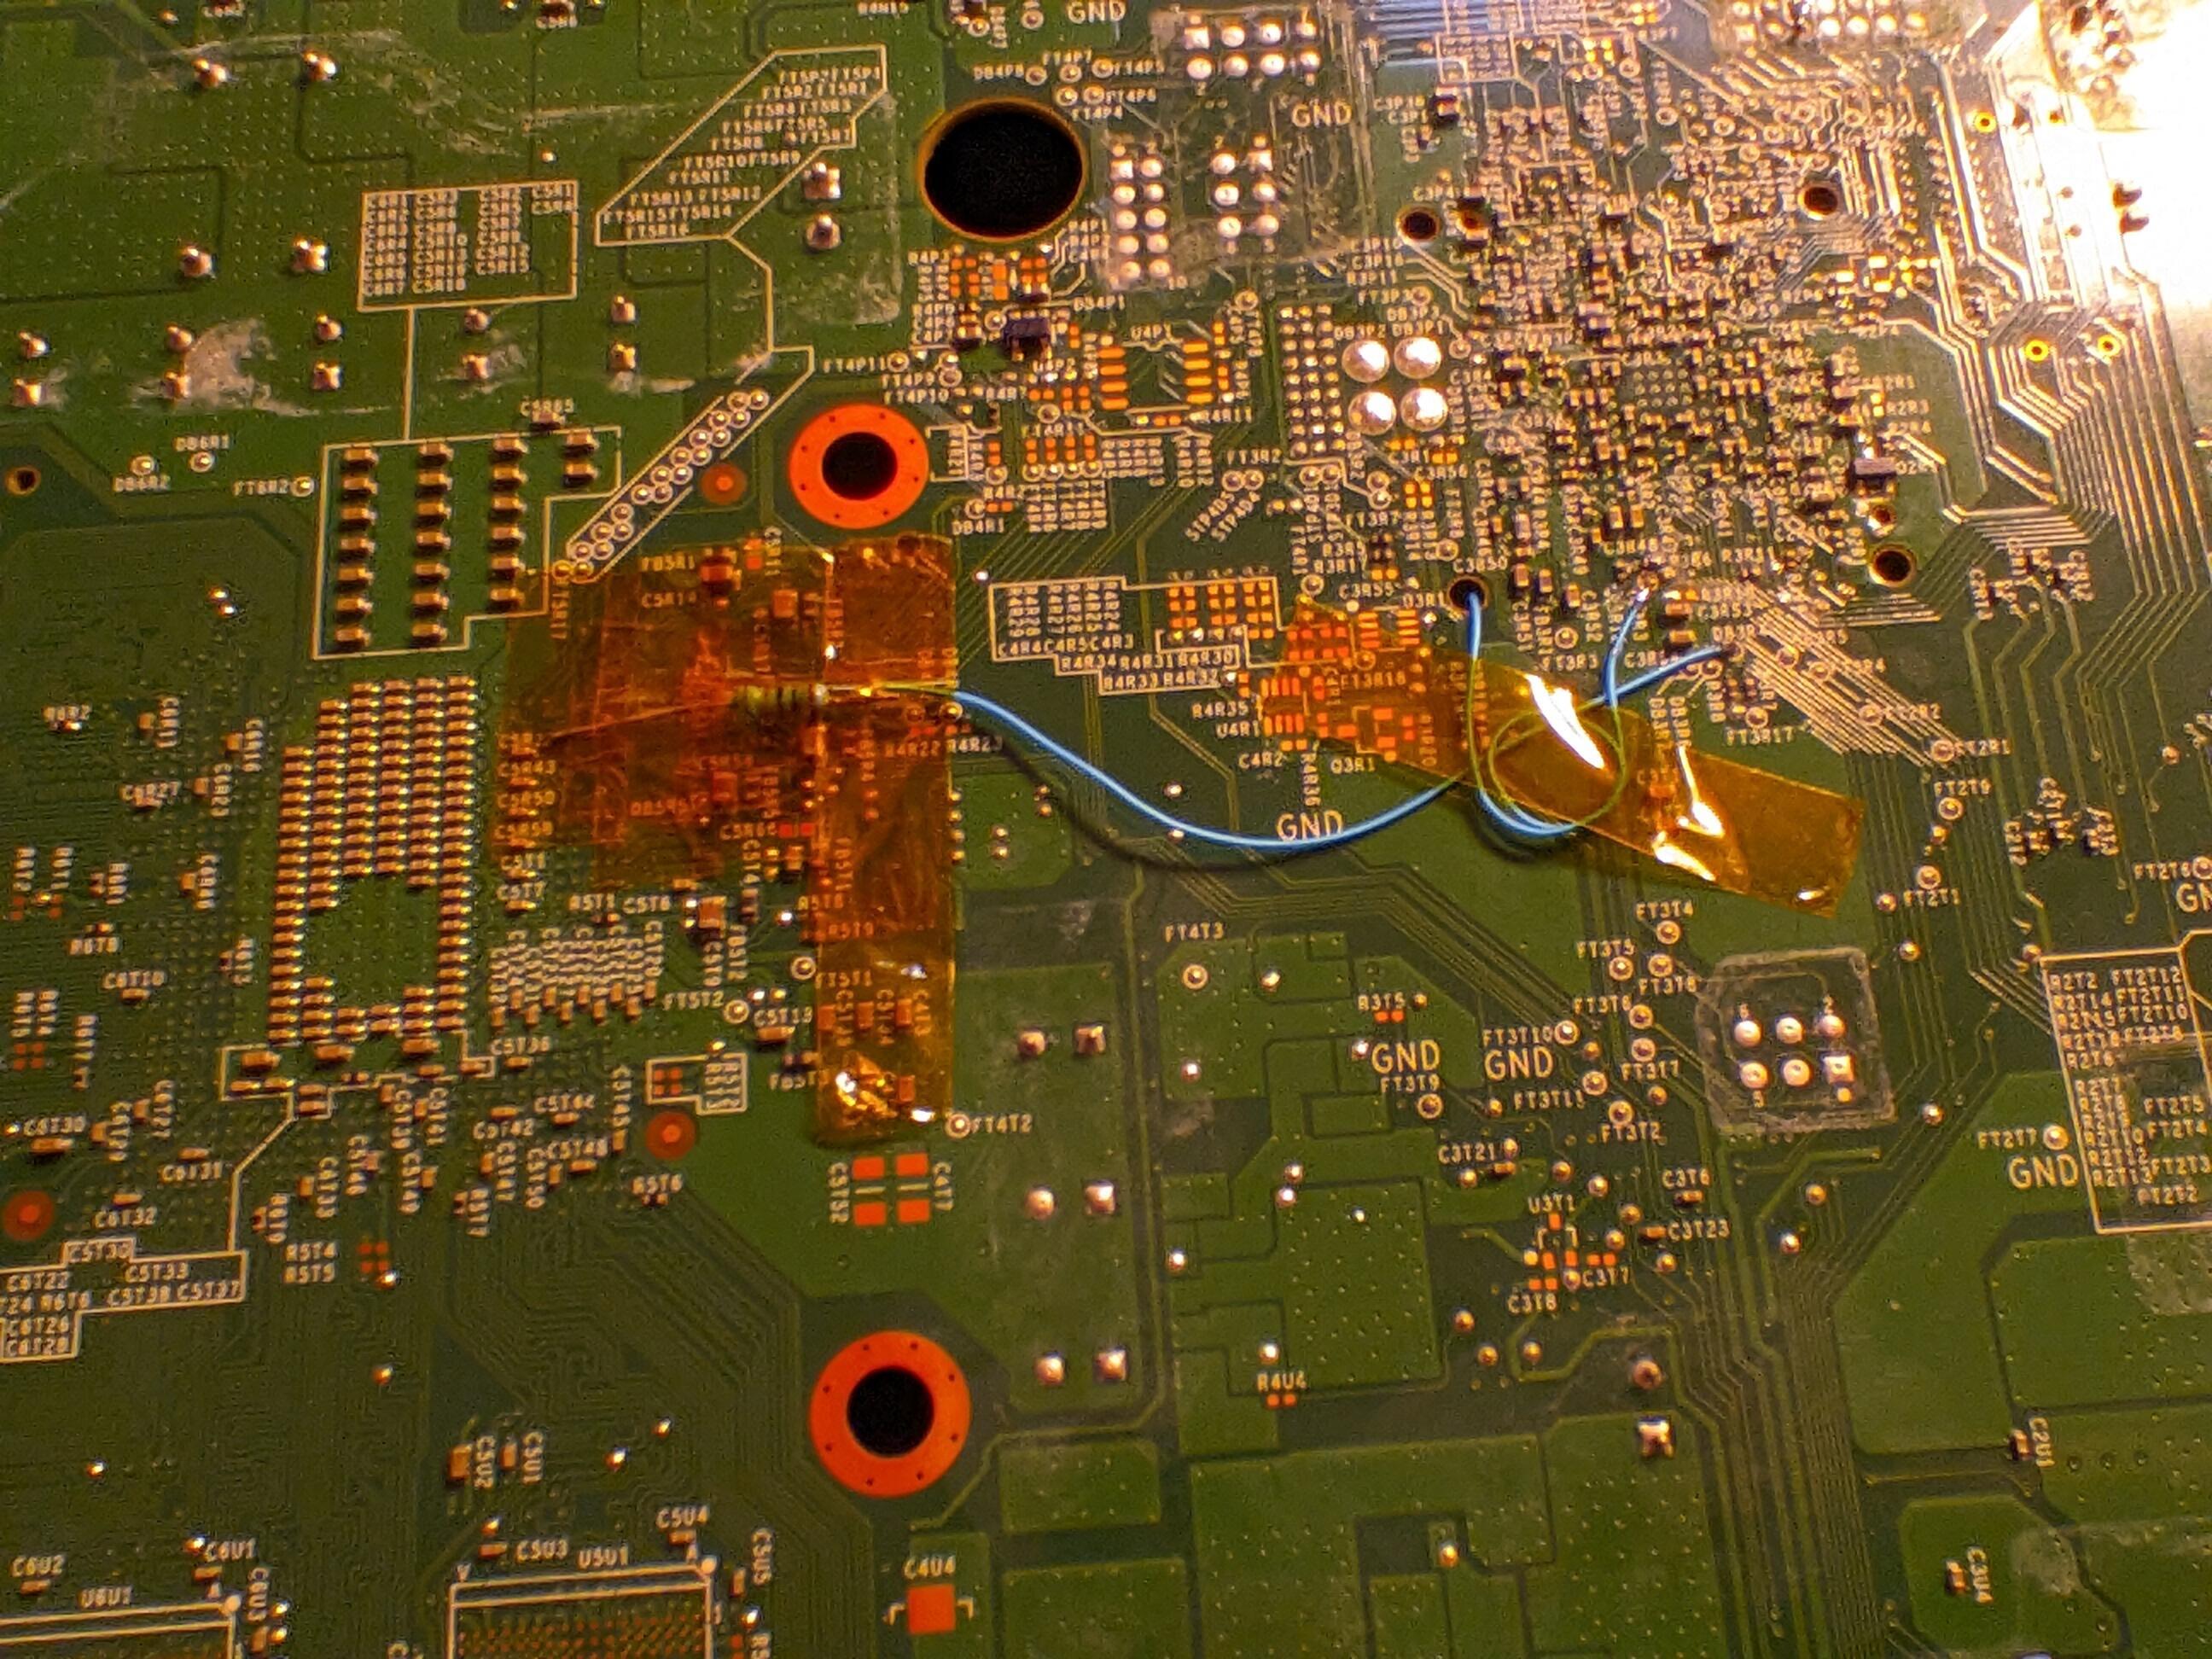
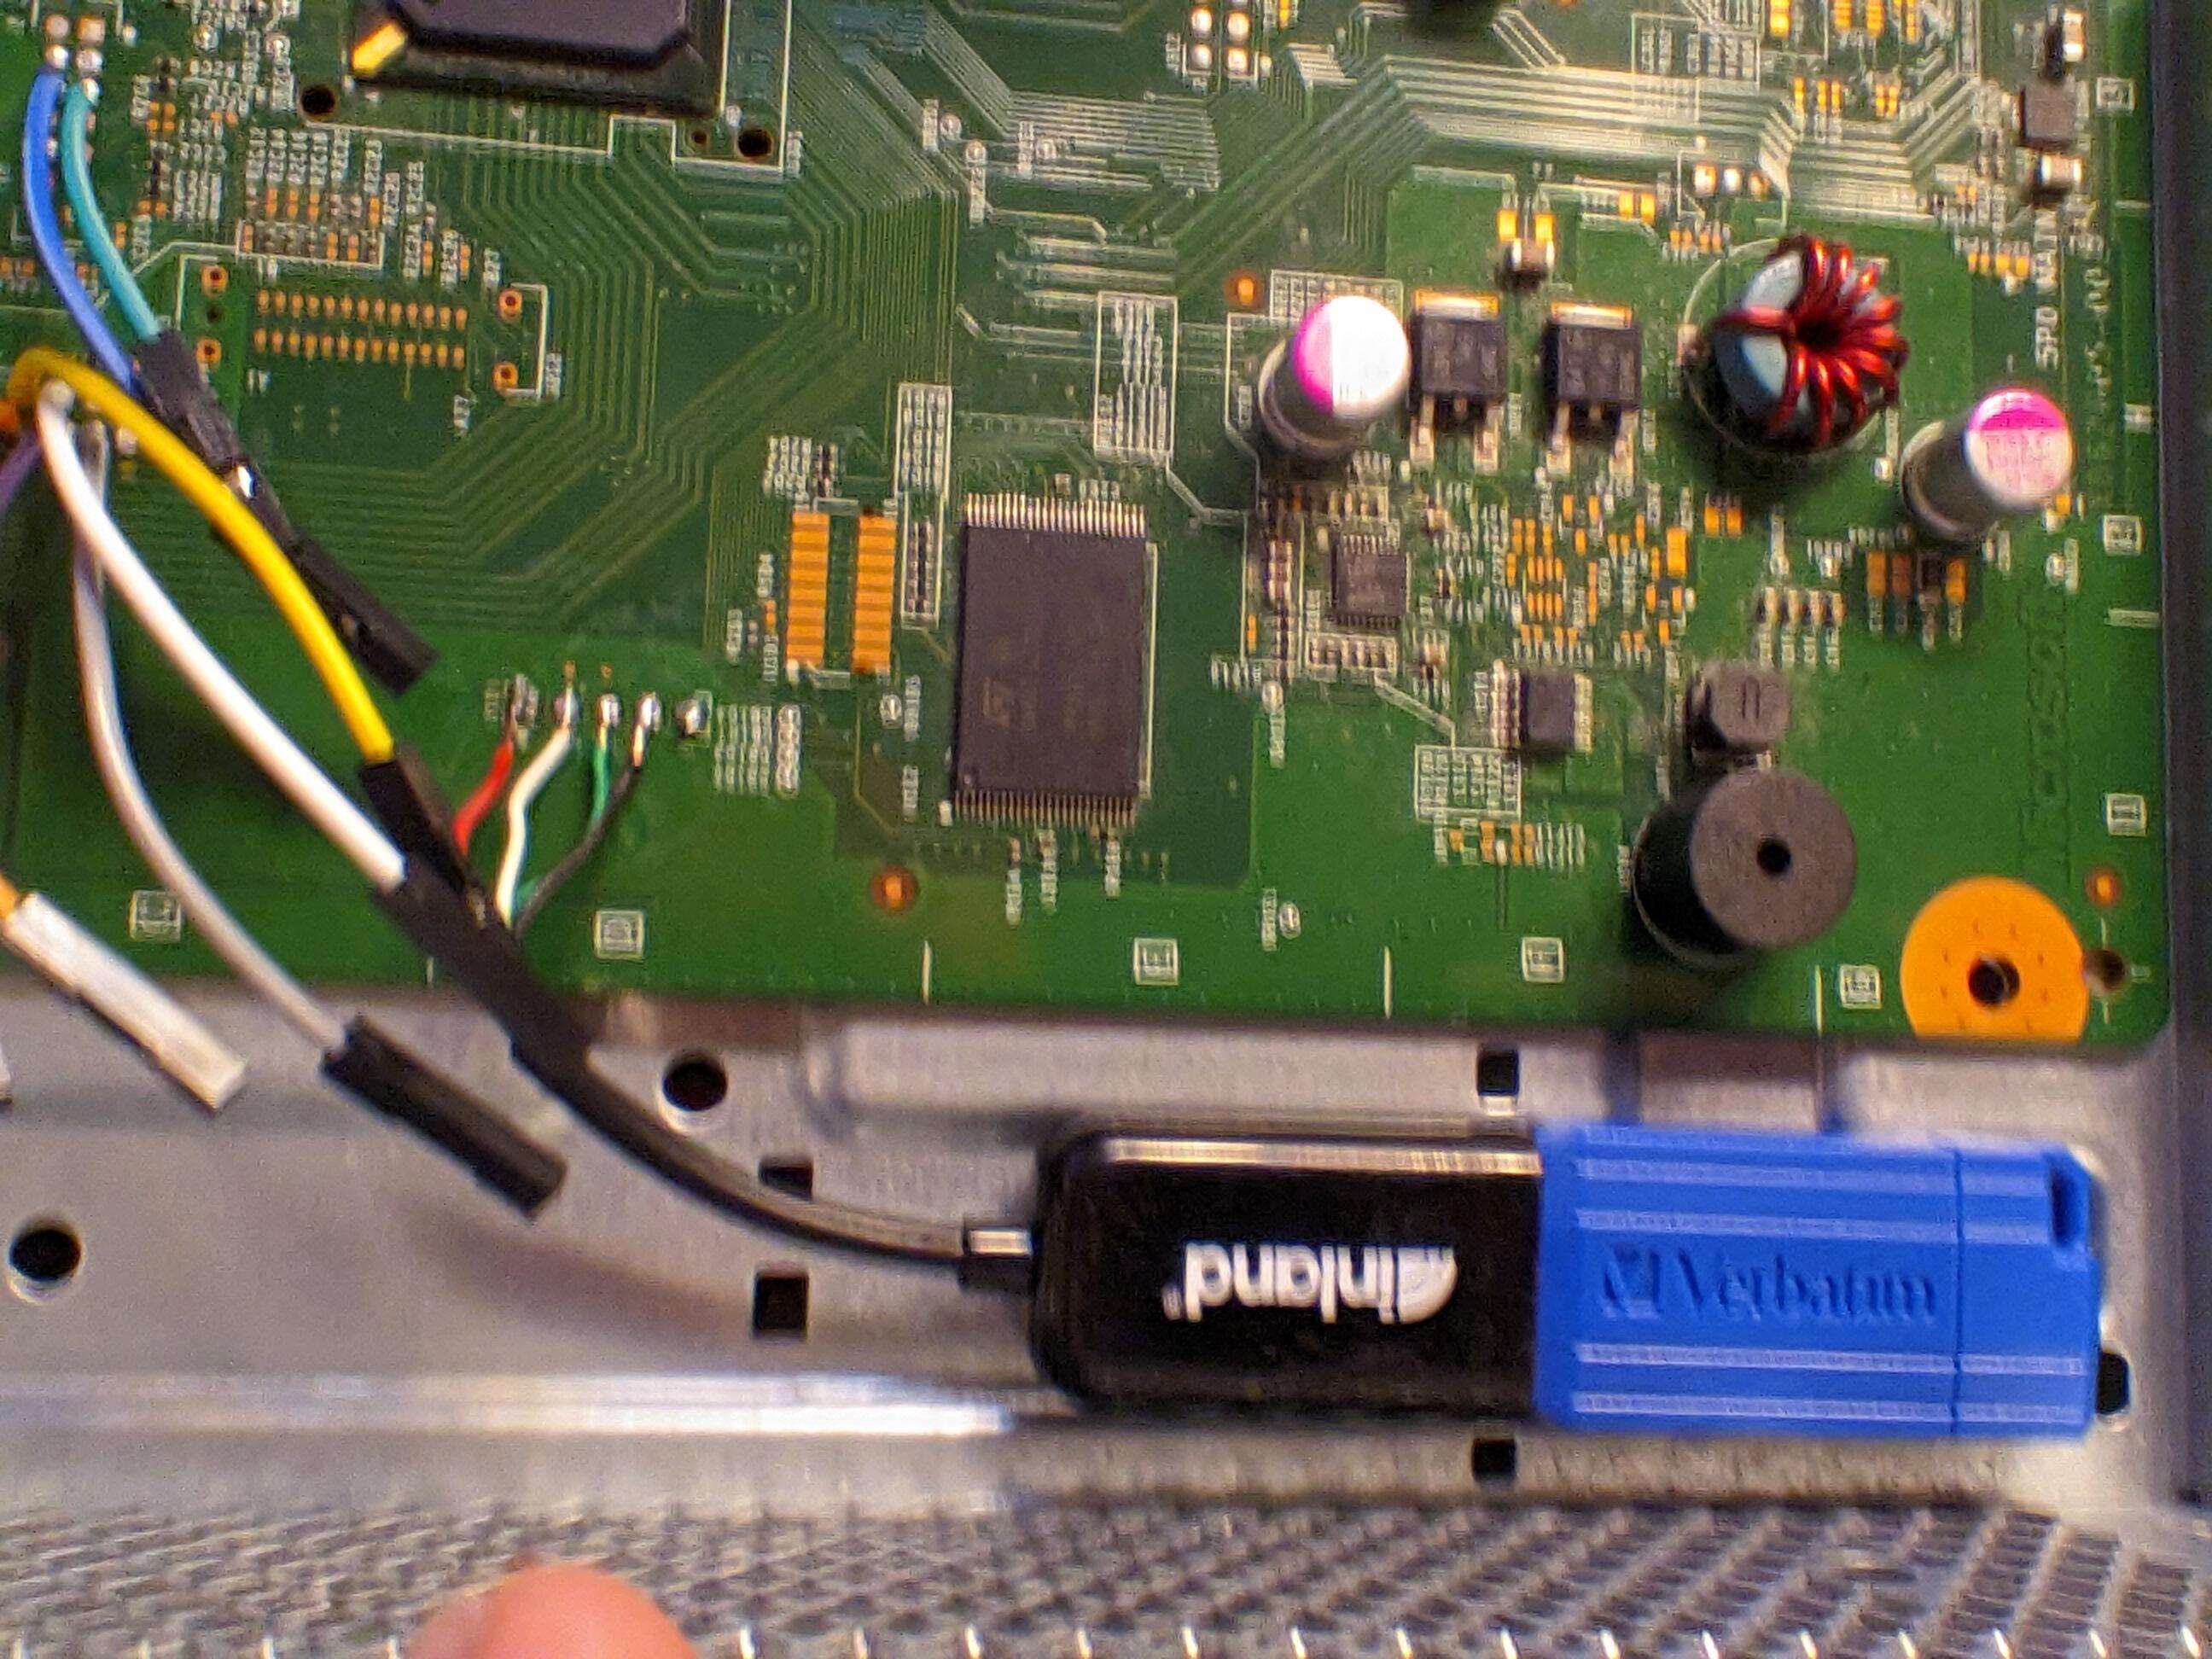
Adding an Internal USB Slot and Connecting the Picoflasher
I saw another fun thing on Reddit, and that was someone, u/a29psx, who had added an internal USB slot in their Corona model 360! I figured I wanted to do this too. I cut up an old USB-OTG adapter I had and soldered it to the outlined points on the board. Easy peasy.
If you look in the upper right-hand corner of this photo, you can see where I soldered some dupont wires to connect the Picoflasher. I chose to do this so I could quickly connect and disconnect it. It was actually really easy to get these connected. I simply tinned up the dupont wires, fluxxed and tinned the board, then warmed up the solder on the board and slipped the wires right through. I cut the excess wire on the rear end once the solder cooled off to prevent shorts.
Flashing
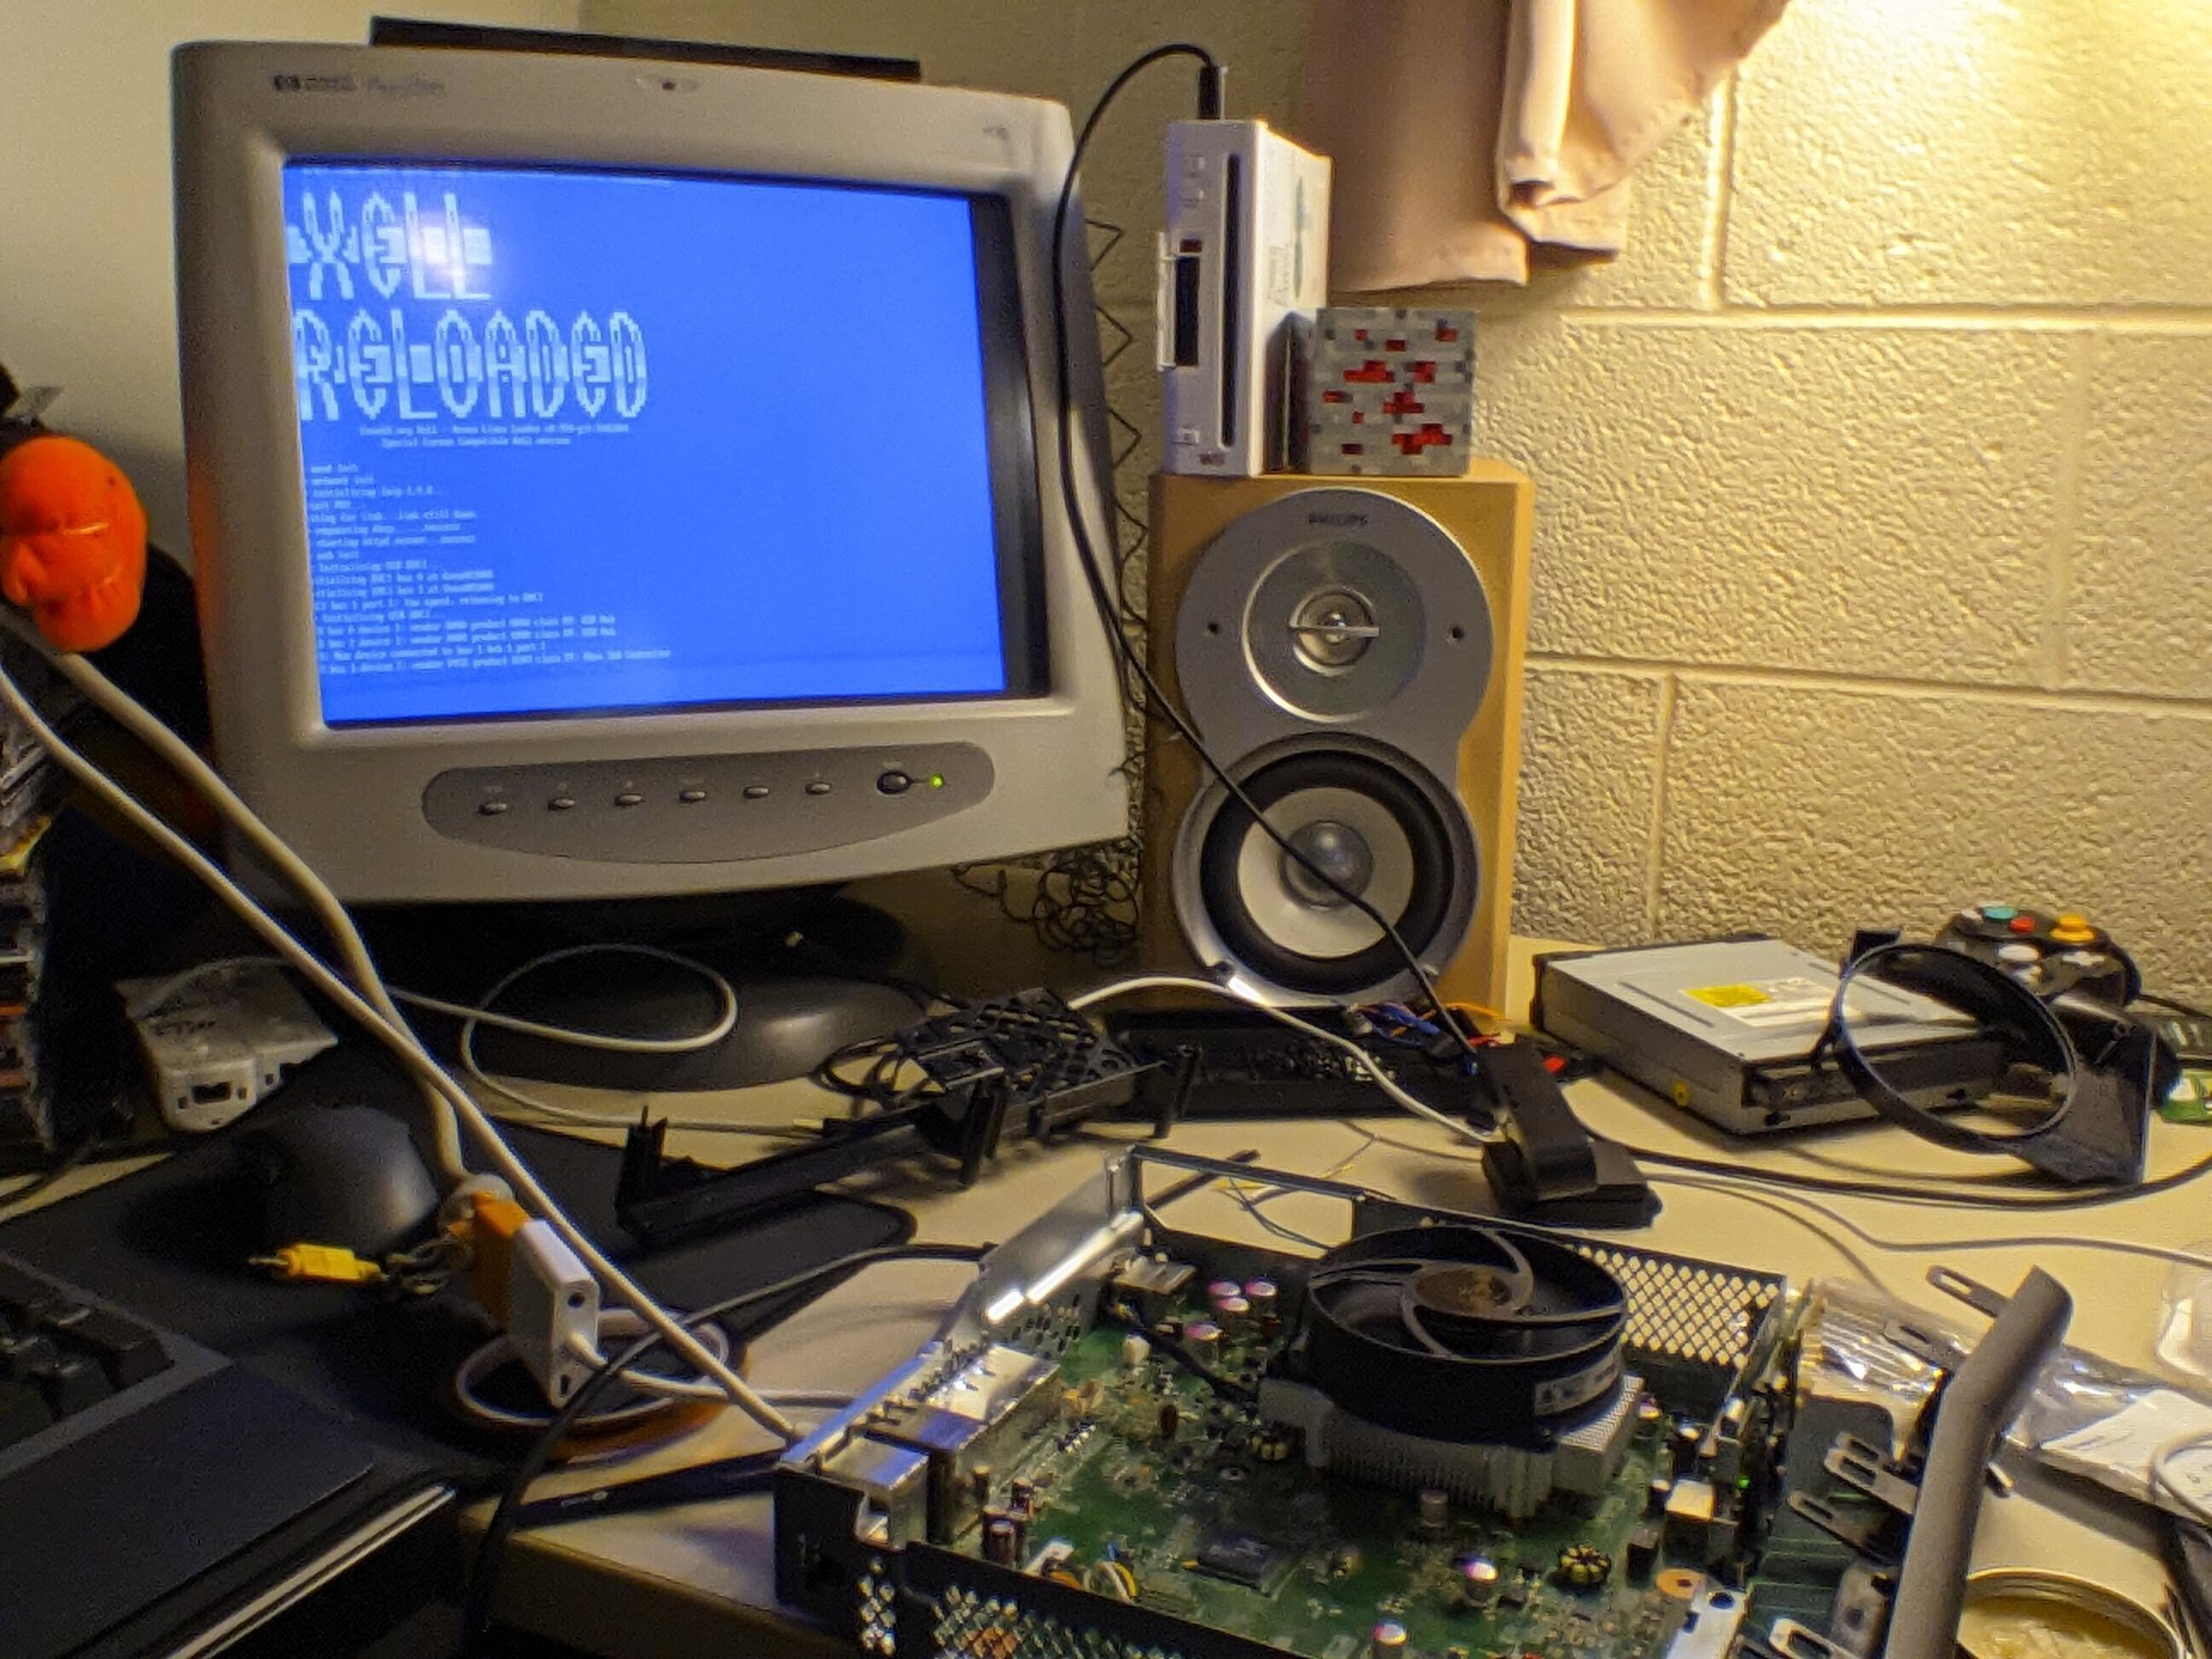
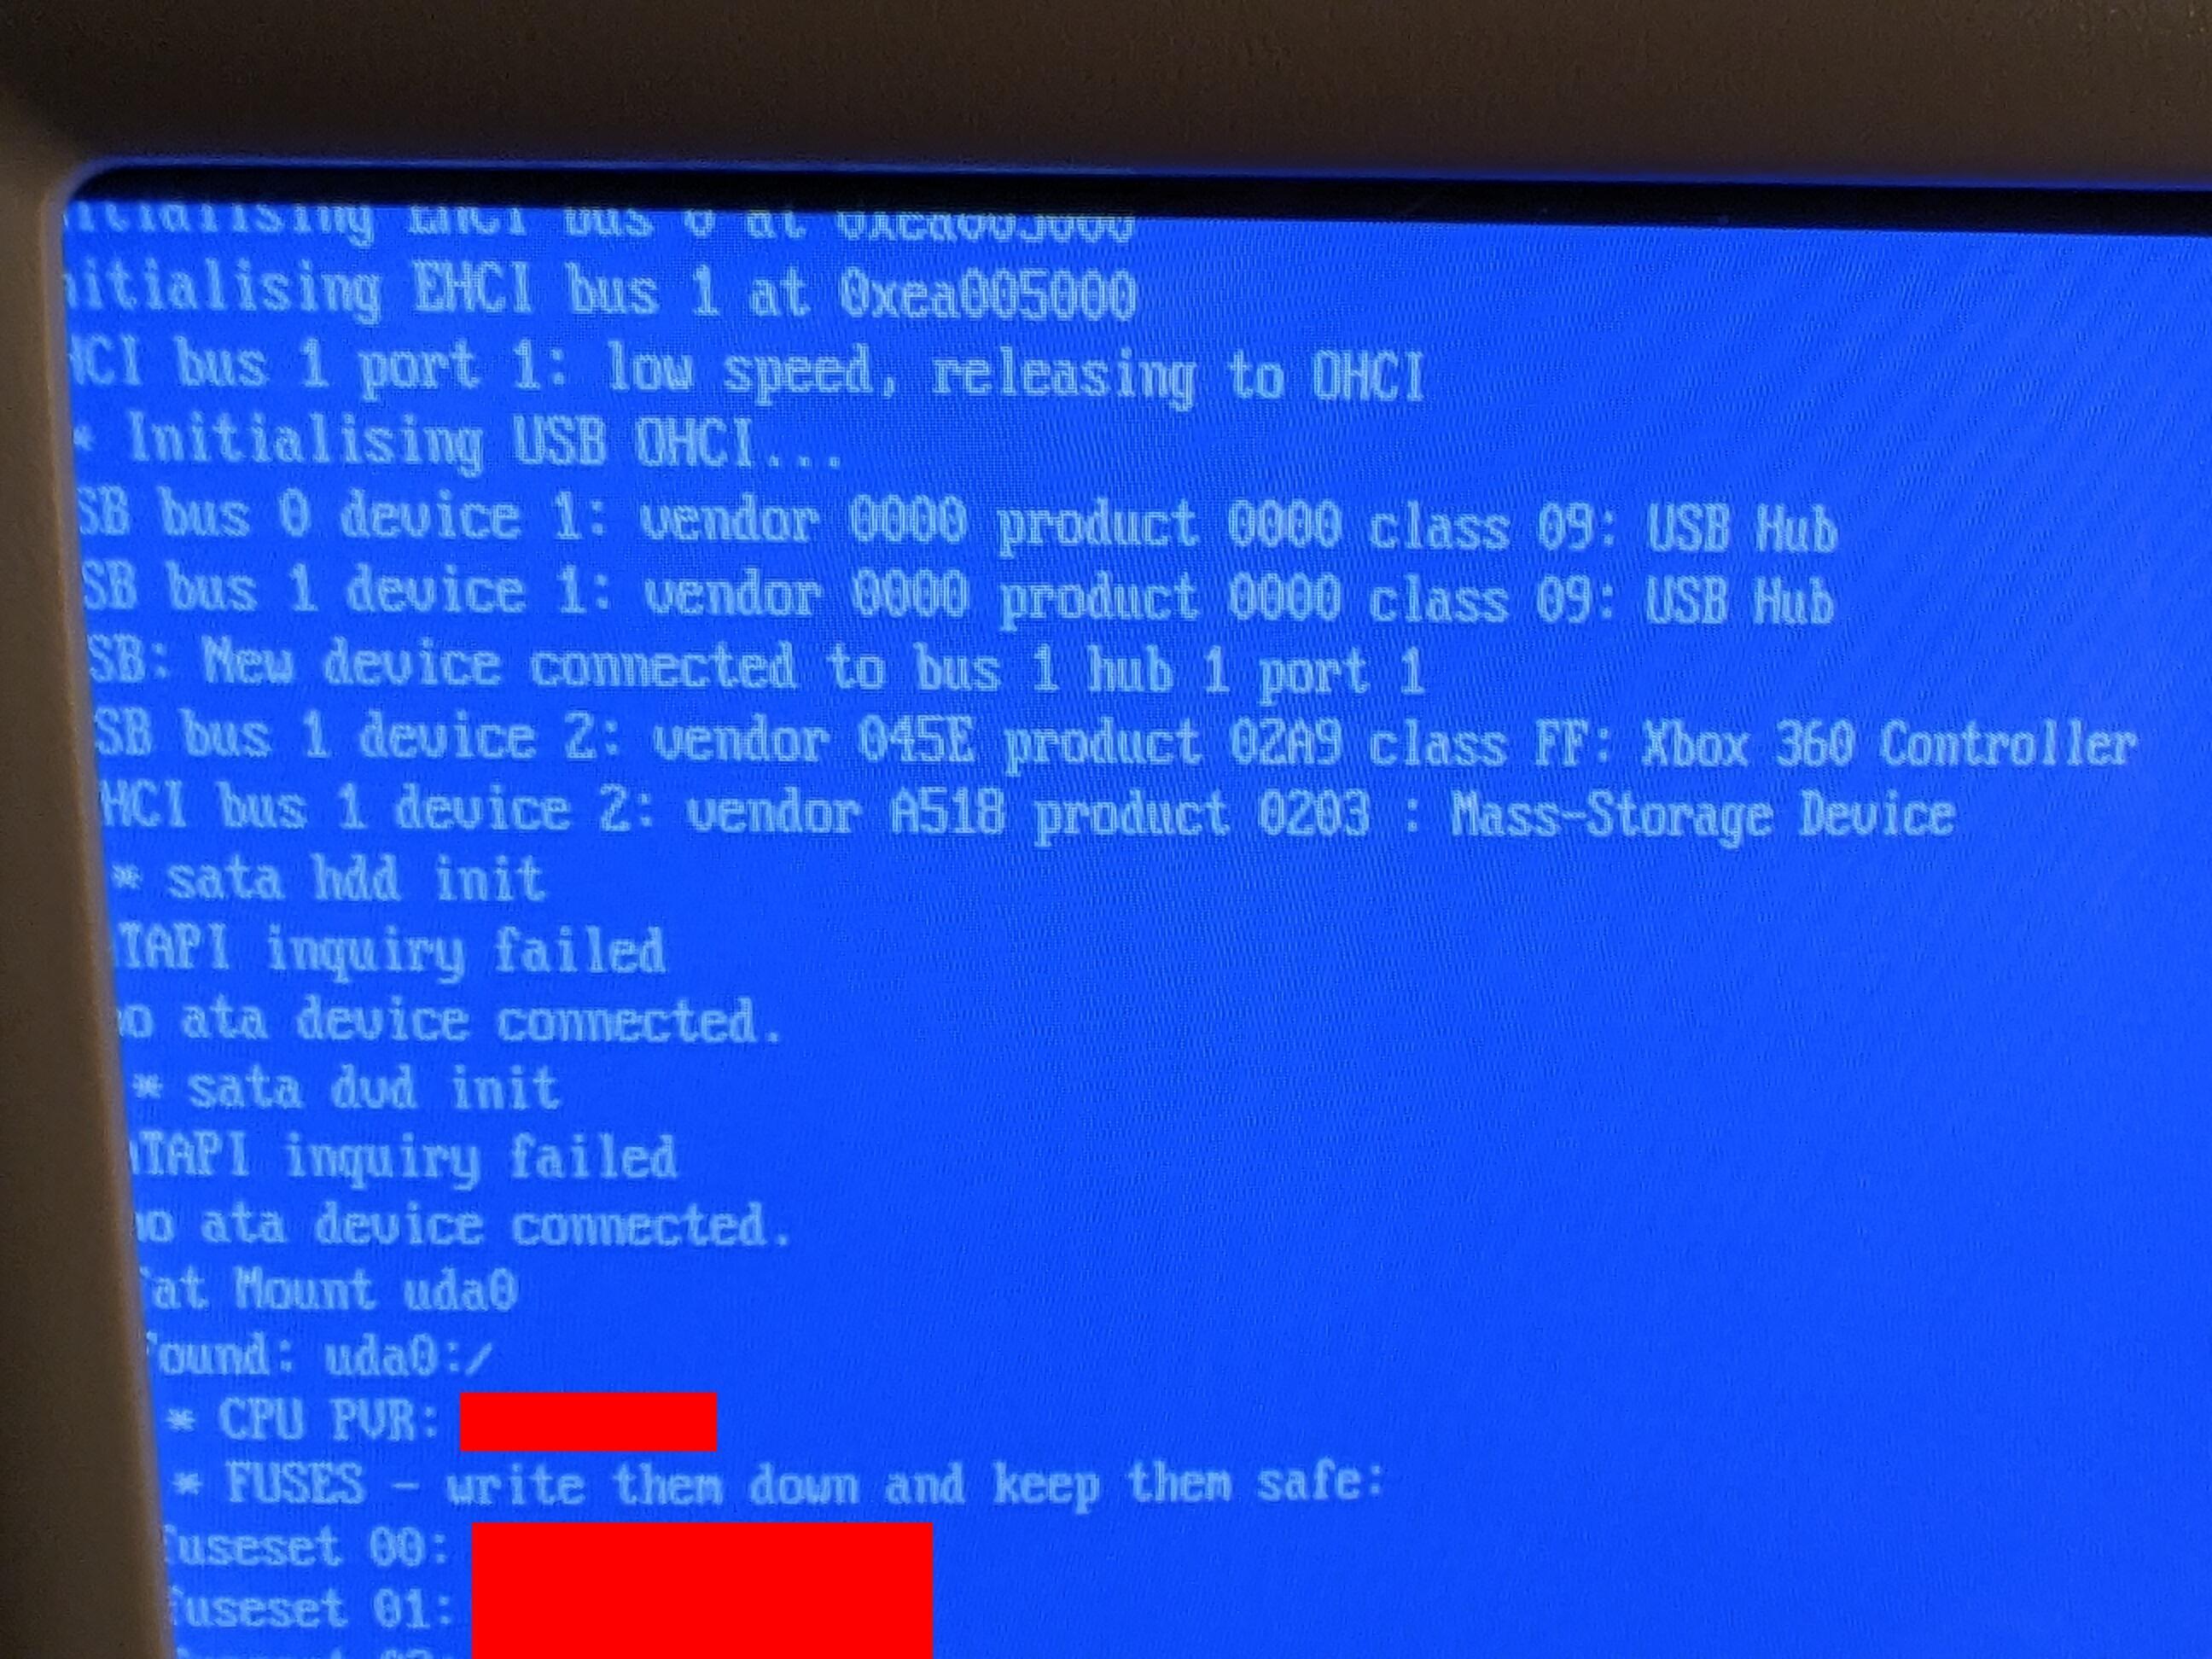
This was a mixed bag for me. Picoflasher was quite easy to install, just drag over the .UF2 firmware file. The problem I ran into was J-Runner. Not only was this software only for Windows (ew!!), I had problems with it detecting the flasher on two different laptops. However, after countless times checking drivers, re-flashing the Pico, and rebooting, I eventually got it to work. I dumped the original firmware, flashed Xell, and hooray!
Additionally, Xell reports that our internal USB slot is working!
Customizing the Xbox, AKA the Cuntening
After copying the keys and fusesets over the network (thanks Xell!), it was time to do some customization. I was initially torn between Aurora Dash and Freestyle Dash. For some background on this, I fucking despise the Metro Xbox 360 dashboard, advertisements and a lack of soul being my main gripes. Thus, I’d want either the Next Xbox Experience (NXE) dashboard or the Blades dash. Freestyle Dash should have been a hole-in-one given it looks like a dead ringer for the NXE dash. The problem was, however, it didn’t have the ability to sync cover art any more and I found no themes that wouldn’t display any cover art. Thus, FSD gets vetoed. Unfortunately, I find Aurora dash to be kind of ugly. In my opinion, it doesn’t really match the design language of any of the Xbox 360’s dashboards very well. Fortunately, I found a theme created by user jveda on realmodscene.com, AuroraNXE. The only issue I’ve ran into being that two loading bars are displayed when using the theme rather than just one. In the grand scheme of things though, this theme looks fantastic! Aurora is able to load all of the cover art automatically and this theme gets rid of my gripes with the default aurora theme.
To store games, I decided to plonk in a 240GB Inland brand SSD into the SATA slot. Initially, this didn’t work when I tried it on stock firmware, however, there must be some tweak made in the customized firmware, as the SSD was detected this time. I formatted it and it works great! Unfortunately, this makes the internal USB mod a little useless haha.
Finally, I wanted to get that classic Xbox start animation. I never had this animation growing up because
our family Xbox (NOT THE ONE I BROKE, I HADN’T SUNK THAT LOW YET) was on the Metro dash by the time we were
given it as a hand-me-down. After doing some research, I found that you could download the original bootanim.xex
and replace the new bootanim.xex with this copy to get the old boot animation back. The one issue with this is
that the file is located on the flash, which many file managers won’t let you write to. Xbox Neighborhood, part
of the Xbox Development Kit suite, doesn’t have this problem. I downloaded some shady files online to set this up,
and after some fiddling, was able to get things set up. Here’s the final result.
Forgive me for the cats. It wouldn’t let me set my name as “4096kb” as that starts with a number, which the Xbox wouldn’t allow. Thus, the username on here is my legal name, which I’m not comfortable sharing.
Closing
Overall, this mod went fantastic! The only problems I ran into were in software and just needed a reboot or a quick wipe of the internal drive on the Xbox. This wouldn’t have gone as smoothly without the resources on ConsoleMods.org, r/360hacks, xbox360hub.com, and Octal’s Console Shop. Anyways, until next time!